
In brief: To make candles from old wax, melt clean wax scraps separately by type, place a suitable wick in a mold and pour in the wax layer by layer. This creates new taper, pillar or floating candles. Keep paraffin, stearin and beeswax separate whenever possible, remove wick remnants and always work with a water bath.
Quick answer: To make candles from old wax, melt clean wax scraps separately by type, place a suitable wick in a mold and pour in the wax layer by layer. This creates new taper, pillar or floating candles. Keep paraffin, stearin and beeswax separate whenever possible, remove wick remnants and always work with a water bath.
Old candles do not have to end up in the trash. You can make new candles from the scraps by sorting and melting the wax, then pouring it into a mold with a suitable wick. This method works well for candle stubs, burned-down pillar candles and wax scraps from lanterns.
When making candles yourself, preparation is key. Remove metal tabs, wick pieces and soot before heating the wax. Sort different types of wax so the new candle burns evenly.
How can old candle wax be recycled?
First, check which wax scraps you have collected. Paraffin is the most common base for household candles. Stearin is harder and often whiter, while beeswax has a distinctive scent and burns with a warm color. Treat gel wax, wax granules and heavily soiled decorative wax separately.
Which types of wax can be mixed?
Whenever possible, mix only wax scraps with similar properties. Paraffin and stearin can be combined in small quantities, but this changes how they burn. Do not mix beeswax with heavily colored or scented wax if you want to preserve its natural fragrance and color.
| Type of wax | Properties | Recommendation |
|---|---|---|
| Paraffin | Melts easily and absorbs color and fragrance well | Suitable for taper and pillar candles |
| Stearin | Hard, retains its shape and burns slowly | Best used separately or with a small amount of paraffin |
| Beeswax | Naturally yellow, aromatic and relatively soft | Collect separately and heat slowly |
Remove wax containing visible foreign matter. You can later filter out small paper fibers or wick remnants with a sieve. If a scrap smells harsh or shows mold, do not use it in a new candle.
A simple test helps with unfamiliar scraps: Break off a piece and check its color, smell and surface. A candle with a sooty coating often still provides usable wax once you remove the top layer. Do not mix such scraps with clean beeswax at first.
Pro tip
Collect wax scraps in labeled jars. Note the type of wax, color and fragrance. This lets you choose suitable scraps for your next project and avoid cloudy or poorly burning mixtures.
What materials do you need to make candles?
A small basic setup is enough for your first project. You do not need a special workshop, but you should protect your work surface with newspaper or a silicone mat. Wax sticks to surfaces and can be lifted off after it cools, but it is difficult to remove from fabrics.
- Wax scraps: Allow around 250 to 400 grams for a medium-sized pillar candle, depending on the mold.
- Candle wick: Choose the thickness based on the candle's diameter, not its height.
- Candle mold: A silicone mold is easy to remove. A clean tin can works for a simple cylindrical candle.
- Melting container: Use an old metal cup or heatproof pouring pot that you no longer use for cooking.
- Pot for the water bath: The container must stand securely and must not float in the water.
- Wooden skewer: Use it to center the wick and release air bubbles along the edge.
- Kitchen scale and thermometer: Both make measuring easier and help you pour at an even temperature.
- Gloves and a protective mat: Heat-resistant gloves protect your hands, while a firm base prevents the mold from tipping over.
Which mold is right for your project?
A narrow mold creates a taper candle, while a wide mold creates a long-burning pillar candle. Small silicone molds are suitable for floating candles or gifts. Choose a mold with smooth inner surfaces if you want an even finish. Textured molds hide minor imperfections and create decorative patterns.
The mold must stand upright before you pour in the wax. Place it in a bowl or tall measuring jug if it tips easily. If you are using an improvised mold, seal the bottom carefully so no liquid wax can leak out.
How do you determine the right wick thickness?
The wick must match the width of the candle. A thin wick is enough for narrow taper candles, while wide pillar candles need a thicker or braided wick. The wick supplier's specifications give you a better starting point than a general rule of thumb.
Secure the wick in the center before pouring. Pull it through a wick tab or tie it to a wooden skewer placed across the mold. Leave five to seven millimeters at the top so the candle can be lit cleanly later.
A tidy work surface makes DIY candle making more enjoyable. Keep boxes for wicks and molds within reach while attaching tools to the wall to save space. For example, you can use stainless steel wall mounts, a separate hose holder for cables and extension cords, or a wall mount and accessories for small work areas.
Important note
Never heat wax directly in a pot on the stovetop, and never add water to melted wax. Liquid wax can catch fire if it gets too hot. Never put out a wax fire with water; instead, switch off the heat source and smother the flame with a suitable lid.
How do you make a new candle from leftover wax?
Work calmly and take it one step at a time. Wax cools quickly, but rushing can lead to splashes, crooked wicks and uneven layers. Have all the materials ready before placing the pot on the stove.
Making candles in eight steps
- Sort the wax: Remove metal tabs, old wicks, labels and large particles of dirt. Cut large pieces into smaller ones with an old knife so they melt evenly.
- Prepare the mould: Place the mould on a stable, heat-resistant surface. Thread the wick through the opening or secure it to the base, then stretch the top end over a wooden stick.
- Set up a water bath: Fill the pot with a few centimeters of water. The melting container must not sit directly on the bottom of the pot and should be securely positioned in the water bath.
- Melt the wax slowly: Put the chopped-up pieces in the container and heat them over low to medium heat. Stir occasionally until no solid pieces remain visible.
- Clean the wax: Remove floating wick fragments with a pair of tongs or pour the liquid wax through a fine metal sieve. Hold the sieve over a second heat-resistant container.
- Pour the first layer: Slowly fill the mould to a few centimeters below the rim. Gently tap the mould so that any trapped air bubbles rise to the surface.
- Allow the candle to cool: Let the candle set at room temperature. If the center sinks, melt a little more wax and fill the hollow.
- Trim and check the wick: Carefully remove the cooled candle from the mould. Trim the wick to five to seven millimeters and test the candle on a fireproof surface first.
Temperature affects the surface. Pouring very hot wax into a cold mould often creates cracks or dull patches. A slightly warmed mould allows the wax to cool more slowly and produces a smoother outer surface.
When making a multicolored candle, only pour each layer once the previous surface has set but is still slightly warm. This allows the layers to bond without the colors bleeding into each other. For a rustic look, individual color transitions can remain visible.
“Candles need a stable base, plenty of space from flammable objects and constant attention. Never leave a burning candle unattended.”
How can you create color, fragrance and unusual shapes?
Leftover wax often already contains color and fragrance. Make use of these properties instead of coloring every project separately. Light paraffin remnants produce clear colors, while beeswax and strongly colored remnants provide their own base color.
How do you create layers and patterns?
For stripes, pour different colors into the mould one after another. Between layers, wait until the surface is no longer fluid. Pour slowly along the inside wall so that the new color does not tear into the layer below.
A marbled pattern is created when you briefly stir two types of liquid wax together. Tilt the mould slightly and rotate it while pouring. For speckled candles, finely chop solid, colored wax and sprinkle it into the mould before adding the base color.
Which fragrances are suitable for homemade candles?
Only use fragrance oils that are suitable for candles. Add the fragrance to the slightly cooled wax after melting and stir thoroughly. An excessive amount can impair the way the candle burns, so follow the manufacturer's instructions.
Citrus, lavender and woody notes work well for candles used on patios and indoors. Mix no more than two fragrances if you are not yet familiar with their effect. Note down the fragrance, amount and type of wax so you can recreate successful blends later.
When are LED candles the better choice?
Open flames do not belong in children's rooms, near curtains or on unattended patios. Battery-operated alternatives are a good choice for these locations.
provides a simple white light for lanterns and shelves. combines a real wax look with a remote control and timer.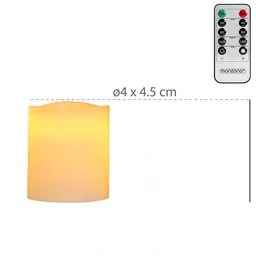
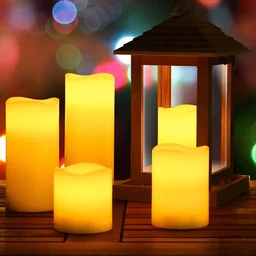
Outdoors,
protects the atmosphere from wind and rain without a flame going out or sparks forming. For several rooms, is a suitable flameless set. Your homemade candle remains a unique handmade creation, while LED candles provide safe lighting.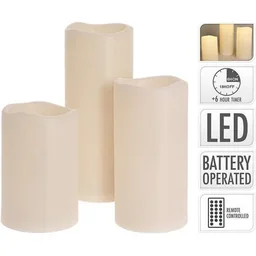
Additional tip
Test new color combinations in a small mould first. A tealight holder or mini silicone mould uses little wax and quickly shows whether the color, fragrance and wick work well together.
What should you do with wax remnants that are not suitable for candles?
Not every leftover piece is suitable for making a new candle. Wax containing a lot of dirt, with an unknown composition or heavy soot residue can make the flame flicker. Use such remnants only for decorative shapes without a wick or dispose of them properly.
How can you fix common problems?
The candle develops cracks: The wax usually cooled too quickly or the mould was too cold. Let the candle set slowly at room temperature and avoid draughts. A second thin layer of wax can smooth out small cracks.
The surface sinks: Wax contracts as it cools. Carefully make a small hole next to the wick and fill the indentation with warm wax. This allows the top layer to bond with the inside.
The flame produces soot: The wick is probably too long or too thick. Extinguish the candle, let it cool completely and trim the wick. If the flame continues to flicker, the wick is probably not suitable for the candle diameter.
How can you reuse small amounts of leftover wax?
Melt very small amounts to make firelighters for the fireplace or barbecue, provided the wax is free from fragrances, glitter and plastic. To do this, dip dry wood shavings or strips of egg carton into the melted wax and let them cool on a base.
Collect thin leftover pieces for making new candles too. After a few projects, you will often have enough for a small floating candle. Do not pour wax down the drain, as it will cool there and can block the pipes.
How can homemade candles burn safely?
Place every candle on a non-flammable, stable base. Keep curtains, paper, dry branches and other flammable materials away from it. In the garden, place pillar candles in a sheltered lantern and keep a sufficient distance from plants and wooden furniture.
Never leave children or pets alone with an open flame. Extinguish the candle before it burns all the way down to the base. Use a candle snuffer to put it out, or carefully blow out the flame if there is no risk of splashing wax.
Pay particularly close attention during the first burn test. If the flame is too large, the rim produces soot or the container becomes unusually hot, extinguish the candle immediately. Poor burning behaviour indicates that the wick, wax and mould are not well matched.
“Burning candles should never be placed near children or pets. Fire can spread quickly, especially on Advent wreaths and dry decorations.”
Reusing candle wax saves materials and opens up many creative possibilities. Sort the remnants, use a double boiler and choose a wick that matches the diameter. With layers, colours and different shapes, you can turn ordinary stubs into new candles for the table, windowsill and patio.
Frequently Asked Questions
- Which wax remnants can you mix when making candles?
- You can mix paraffin wax with paraffin wax and stearin with stearin. Beeswax is best kept separate because it has its own melting range and fragrance. You can test small amounts of different types, but the colour, burn time and hardness of the new candle may change.
- Why should you melt leftover wax in a double boiler?
- A double boiler heats wax evenly and prevents direct contact with the hob. Place chopped wax remnants in a heat-resistant container, put it in a saucepan of hot water and stir slowly. Never leave the container unattended and keep water out of the wax.
- How long should the wick of a homemade candle be?
- Trim the wick so that it protrudes about five to seven millimetres from the cooled candle. A wick that is too long produces soot and creates a large flame. A wick that is too short will drown in the melted wax. Trim it again before each lighting.
- When can you add fragrance oil to melted candle wax?
- Add candle fragrance oil only to melted, slightly cooled wax. Follow the manufacturer's dosage instructions and do not use perfumes or essential oils unless they are approved for candles. Too much fragrance can alter the flame, produce soot or make the candle unstable.
- How should you dispose of wax remnants that are no longer suitable?
- Do not remove liquid wax through the drain. Let small amounts solidify first and put them in general waste if you cannot reuse them. Take larger quantities to your local waste disposal centre. Wipe containers out with kitchen paper before washing them.
You might also like
- Upcycle Candle Wax Leftovers: Sustainable DIY Ideas for Your Home
- Make Twisted Candles: Creative Candle Twisting
- Make Your Own Wax Crayons: Creative Crafts for Kids
- DIY Wax-Coated Paper Stars: Make Festive Christmas Decorations
- Cast Concrete Candle Holders: Step-by-Step DIY Guide
- Decorate Sorbian Easter Eggs: DIY Wax Technique Guide